
Factory & Quality Control
Wrinkles on Melamine-Faced Panels: 4 Root Causes and Practical Fixes
Wrinkles, waves and substrate telegraphing can look similar but begin at different production stages. The defect pattern points to the first checks.
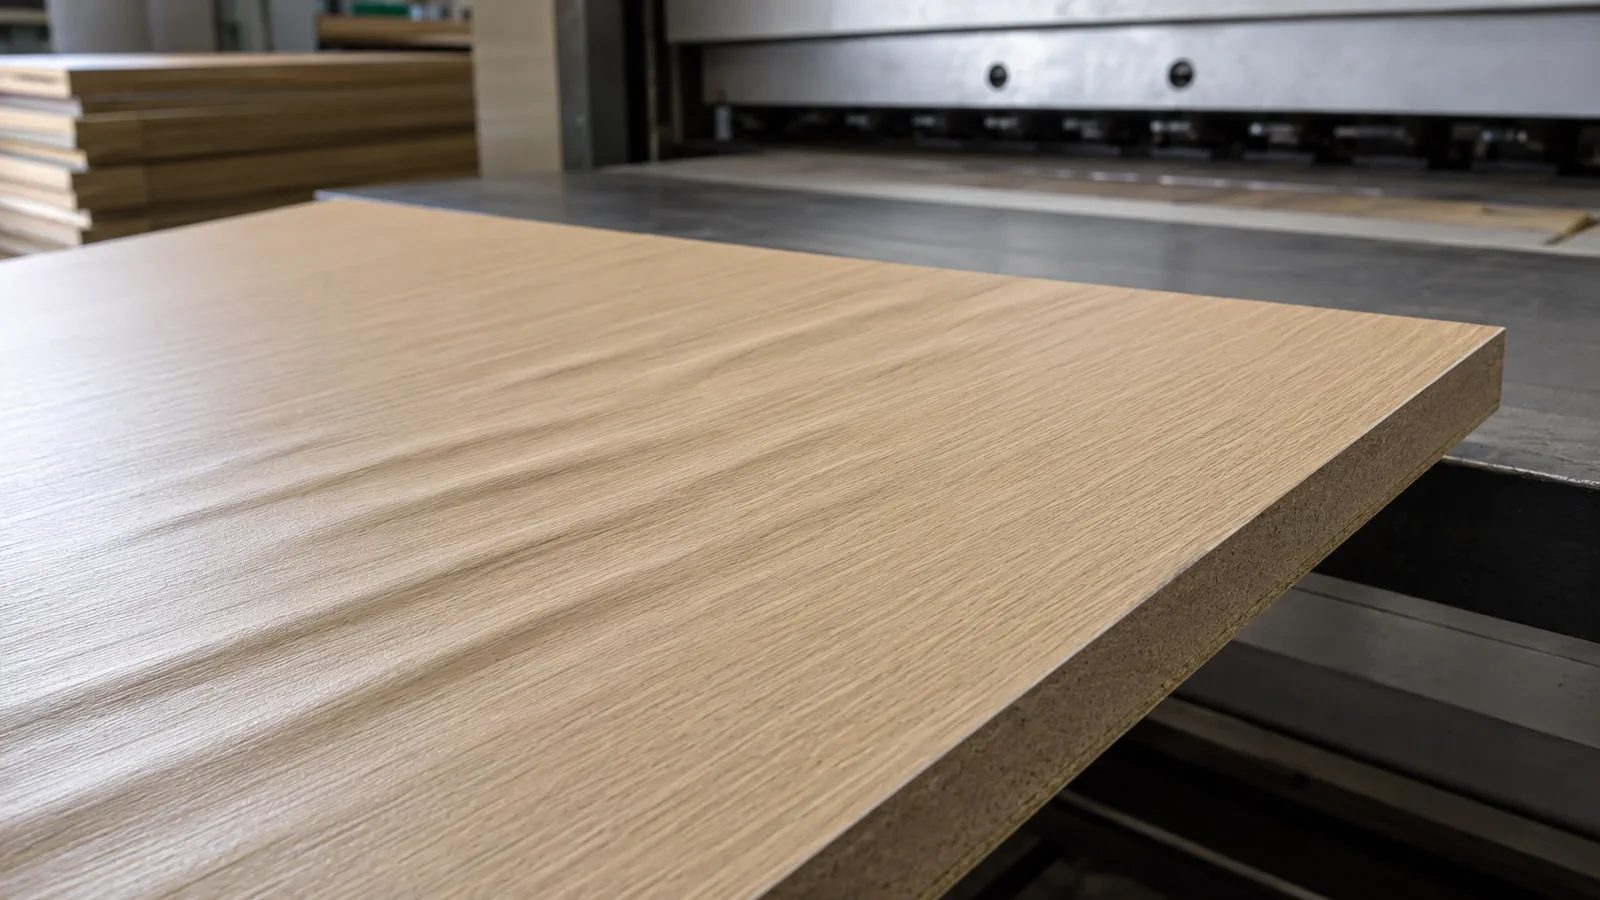
Wrinkles on a decorative panel may appear as short waves, long parallel lines or irregular raised patterns. They reduce the quality of the finish and can become more obvious after cutting or under angled light.
The first step is to identify what the eye is actually seeing. A physical wrinkle in the decorative paper, a rough substrate showing through the surface, and an intended embossed wood texture are not the same defect. Treating them as one problem leads to repeated adjustments without a stable result.
First, classify the surface pattern
Use low-angle light and inspect both the face and the edge of the panel.
- True paper wrinkle: the overlay has folded, shifted or formed a raised line.
- Substrate telegraphing: sanding lines, fibers, chips or core irregularities are visible through the face.
- Resin-flow mark: the surface shows a change in gloss or a wave-like boundary without a clear fold.
- Intentional texture: the pattern repeats consistently and matches the approved press plate design.
Check several boards. If the defect repeats in the same location, the press plate or loading position deserves attention. If it follows the substrate surface, preparation is the more likely cause.
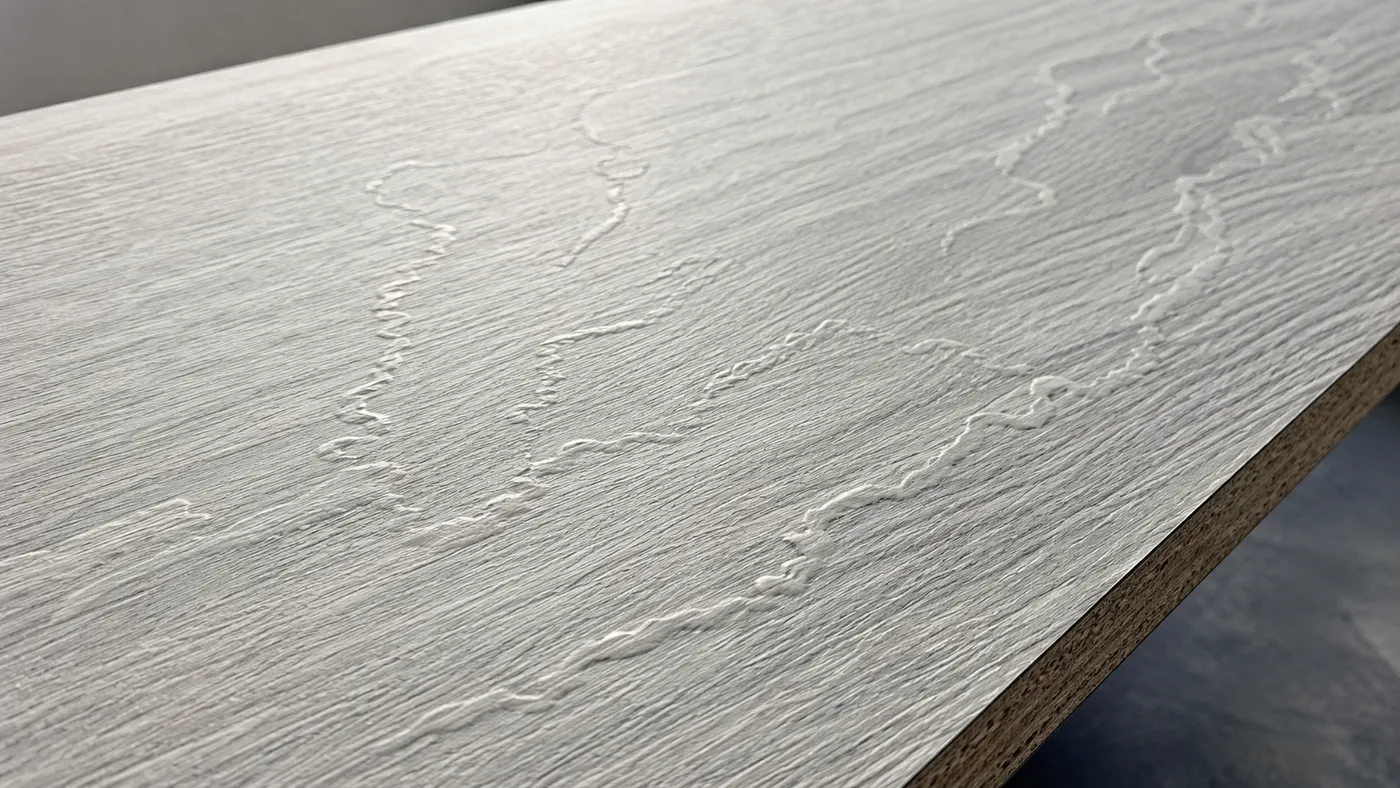
Abnormal raised lines vary in direction and thickness, unlike a consistent approved woodgrain texture.
Root cause 1: poor substrate surface preparation
The decorative layer is thin. It cannot hide deep sanding lines, raised fibers, dust, chips or local thickness differences in the substrate.
MDF can show fiber lifting or uneven sanding. Particle board may contain coarse particles near the face. Plywood can telegraph veneer joints, overlaps or repaired areas. When pressure is applied, those features may become more visible rather than disappear.
Practical fixes
- Confirm surface smoothness before lay-up.
- Keep sanding belts and calibration equipment in good condition.
- Remove dust thoroughly.
- Separate panels with local surface damage.
- Do not expect extra pressure to correct a substrate that is already uneven.
For buyers, a clear close-up of the defect under angled light can help determine whether the line is in the overlay or beneath it.
Root cause 2: paper handling and lay-up errors
Impregnated paper must lie flat before the press closes. Creases can be introduced when paper is transported, unrolled, aligned or placed on a dusty surface.
Paper that has absorbed moisture may lose flatness and become harder to position. Static, air pockets or rushed manual lay-up can also allow the sheet to shift. If the paper moves as the press closes, a fold or wave may be locked into the surface.
Practical fixes
- Keep paper sealed and flat until use.
- Handle sheets with clean tools and hands.
- Control alignment and prevent paper overhang from catching.
- Remove dust and loose particles from the lay-up area.
- Review loading speed and paper stability before changing the press recipe.
Root cause 3: unsuitable paper condition or resin behavior
The paper must soften, flow and cure within a controlled window. If it is too dry, too moist, partially pre-cured or unevenly impregnated, the resin may not distribute consistently during pressing.
This can produce localized waves, gloss differences or areas that resemble wrinkles. The same design from two different batches may behave differently if it has been stored or conditioned differently.
Practical fixes
- Check paper batch information and storage history.
- Verify relevant supplier values such as volatile content and curing behavior.
- Run a controlled trial when paper, color, grammage or supplier changes.
- Keep exposed paper away from heat and humid air.
- Avoid mixing material from different conditions in the same stack.
Root cause 4: uneven closing, heat or pressure
The paper and resin need uniform contact across the panel. A press that closes unevenly, a worn cushion, a contaminated plate or a temperature difference can allow one area to move while another is already fixed.
Release behavior also matters. A sudden or uneven opening can disturb a surface that has not stabilized. The correct process depends on the equipment and material system, so random parameter changes can easily create a second defect while hiding the first.
Practical fixes
- Verify platen flatness and temperature distribution.
- Inspect press plates, cushions and loading supports.
- Confirm pressure distribution across the full sheet.
- Record closing, pressing and release behavior.
- Adjust one parameter at a time and compare the result with a retained reference.
Defect pattern and likely source
| What you see | First checks |
|---|---|
| Long parallel lines | Substrate sanding, conveyor contact or paper feed direction |
| Short isolated folds | Paper handling, lay-up or trapped particles |
| Waves near one edge | Paper alignment, edge moisture or uneven initial contact |
| Same mark on every panel | Press plate, cushion, debris or a fixed machine position |
| Glossy wave without a raised fold | Resin flow, paper condition or uneven heat |
| Pattern appears only on one substrate batch | Surface preparation, moisture or thickness variation |
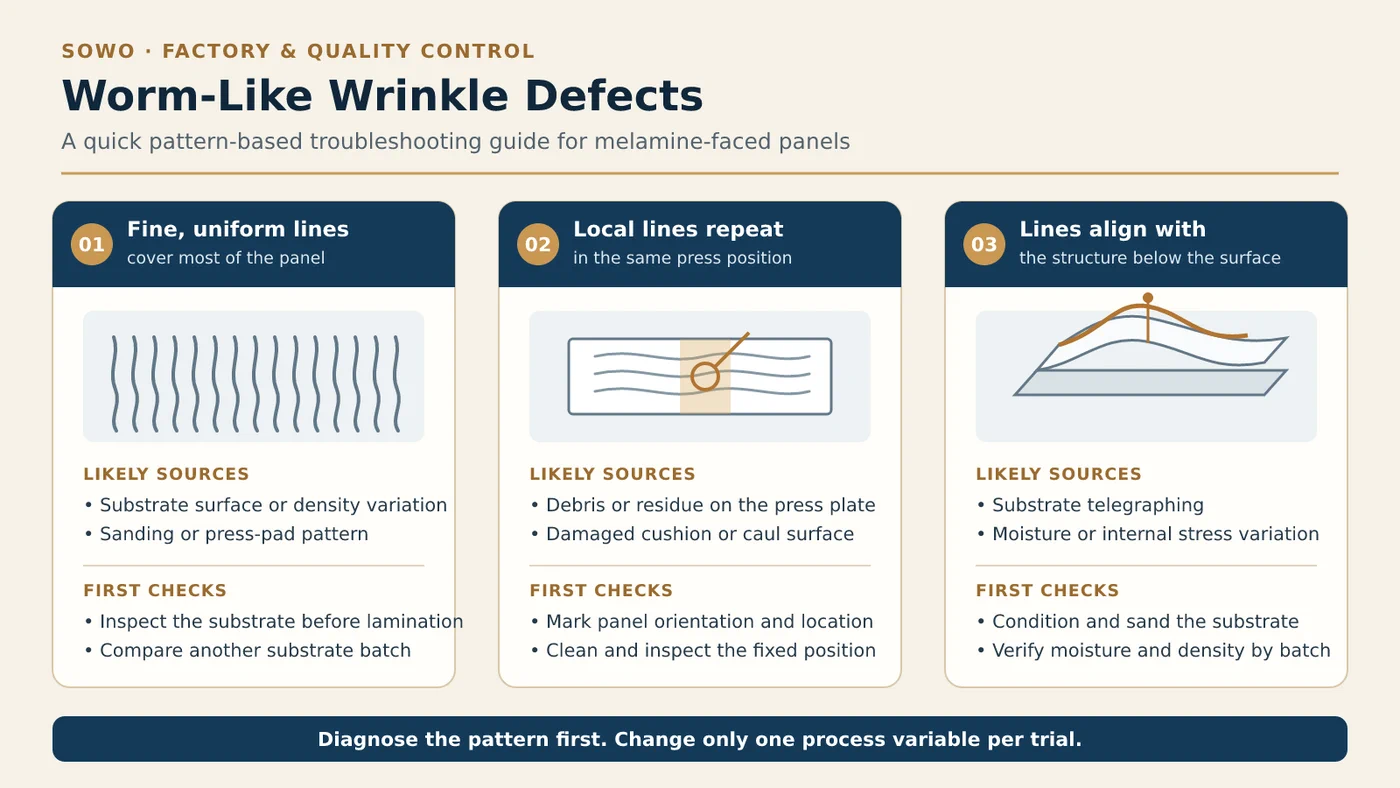
The distribution of the lines helps determine whether to inspect the substrate, a fixed press position or the board structure first.
A disciplined troubleshooting method
When wrinkles appear, stop and preserve evidence before making adjustments.
- Mark the panel orientation and press position.
- Photograph the surface under direct and low-angle light.
- Compare affected and acceptable panels from the same order.
- Record substrate, paper, press and operator batch information.
- Check whether the defect repeats by location or material lot.
- Change one suspected variable and run a small trial.
- Keep both the failed and corrected samples.
This method is slower than turning several machine settings at once, but it prevents the same defect from returning on the next production lot.
What buyers should include in a claim
A useful technical claim should include:
- order and pack identification;
- product size, thickness and surface;
- number or percentage of affected panels;
- full-panel and close-up photos;
- photos under angled light;
- the defect location and direction;
- storage and processing conditions; and
- whether the issue appeared before or after machining.
These details help the supplier separate production defects from handling or application damage and respond more quickly.
The practical takeaway
Surface wrinkles are not solved by adding more pressure or more heat without diagnosis. The correct action depends on whether the problem begins in the substrate, paper, lay-up or press.
A smooth, stable panel starts with a flat substrate and properly conditioned paper, then depends on clean handling and uniform pressing. When those controls are traceable, both factories and buyers can resolve defects with evidence rather than guesswork.
Need help with decorative panels?
Send your specification or quality-control question to SOWO.
Share the substrate, thickness, surface, quantity, destination and any defect photos. We can review your application and prepare a factory quotation for the agreed specification.
Request Samples / Get a Factory QuotationMatch the inspection plan to the actual substrate and surface process. Product-specific selection and quotation details are available for Melamine Paper, Synchronized Melamine MDF, Synchronized Melamine Particle Board, Synchronized Melamine Plywood.